Easing with the Motion Editor
Getting your head around the new Motion Editor in Flash CS4 can take a little while. When I first looked at it, the shear size of the dialog and all of the graphs made me shutter. In this post, we'll take an in-depth look at setting up easing with the Motion Editor.
Start by creating a basic motion tween of an object moving on the x-axis across the stage from left to right. Note: you cannot use the motion editor with a classic tween, it has to be a new motion tween. Select the motion tween in the timeline and then open up the Motion Editor panel. Since the panel is so large, you may want to set it up in a dock near the properties panel as opposed to its default location near the timeline. This allows you to see the timeline, stage, and Motion Editor panel all at once.
Each property of the symbol you are tweening is listed in the Motion Editor panel. Each property has an easing drop-down next to it and all of them are assigned to no easing. There's a simple (slow) ease at the bottom of the Motion Editor, but it's not assigned to anything.
Before we begin with the Motion Editor, you'll want to customize the view. There are three icons at the bottom of the panel. The first one controls the row-height of the properties you are not currently working with. The second one controls the row-height of the property you are working with. You'd have to click on a property to begin working with it. The last one controls how many frames you are seeing. You'll want to drag this out to its maximum value to see all of the tweened frames.
In the Eases row, you can click on the Plus (+) symbol to either use preset eases that come with Flash or create your own custom ease. Choose Custom from the bottom of this menu. In order to apply the ease to your animation, go back up to Basic Motion X and choose Custom from the No-Ease drop-down. We haven't made any changes to the custom ease yet, so there'll be no change to your current animation however, once we make a change, the easing will be applied to the X property.
Right now, the easing graph displays a diagonal line that goes from 0% to 100% across 24 frames. The horizontal unit defines the number of frames, the vertical unit is the percent of easing applied to the object. (fig. 1).
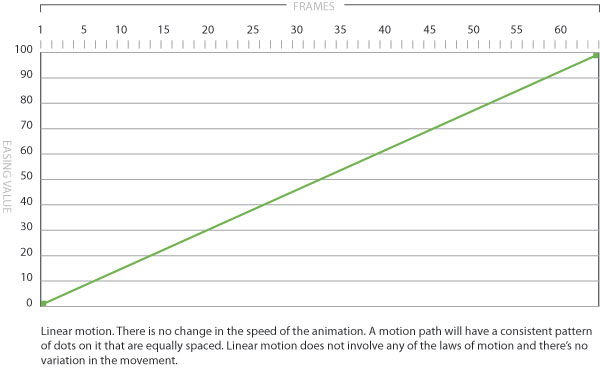
Since the diagonal line is completely straight, then there's no variance in the easing or we have constant motion. There's no change in the speed of the object as it travels from the first frame to the last.
You can manipulate the path that's on the Easing graph just like any other bezier path in Flash. When you click on the anchor points, you'll see directional handles and you can control the direction of the path. It's a little tricky to work with the path in the limited space you have inside of the Motion Editor panel. You can command-click on the path to add points. The graph goes up to 100 and, although you can see more than that and you can even see negative values, you can't drag your anchor points or path beyond 0 or 100.
If we modify the path so that we have a downward curve, that will alter the easing values and change the speed of the animation. (fig. 2).
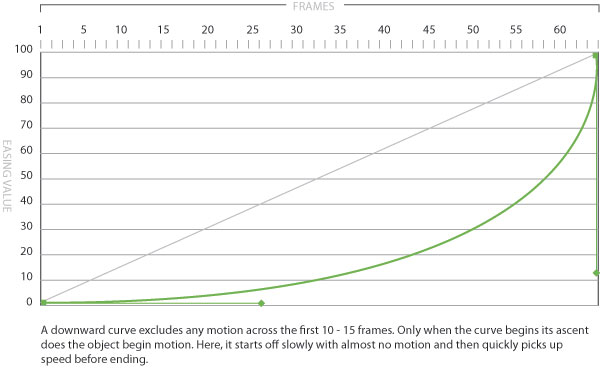
Here, since the curve is bending downward, there is practically no motion at the beginning of the ease. Once it passes frame 15 though, the object will pick up speed as it reaches the final keyframe.
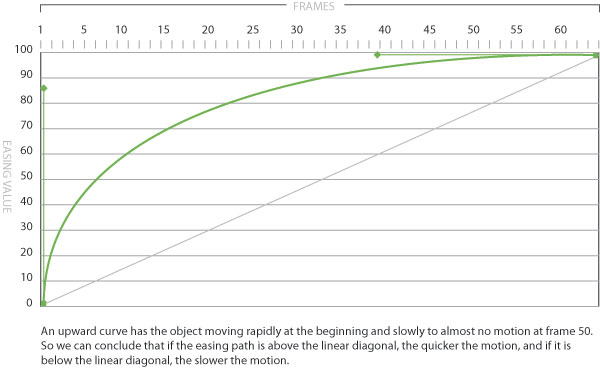
Conversely, if we modify the path so that we have an upward curve, the object will start off quickly and end up slowly. (fig. 3).
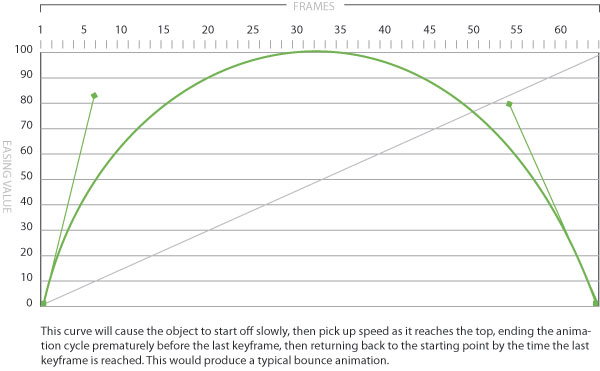
The interesting thing about the graph for easing that is different from the property graphs is that the 100% mark really means the completion of the animation. In this next example, if we make an upside-down U-shaped path, the animation finishes when it reaches the peak of the curve. This creates a bouncing animation so that it quickly ascends to its final destination and then slowly returns to its original position. (fig. 4).
There's a preset easing called bounce and bounce in, which are similar to this one. If we add multiple upward curves, then we will get multiple bounces. (fig. 5).
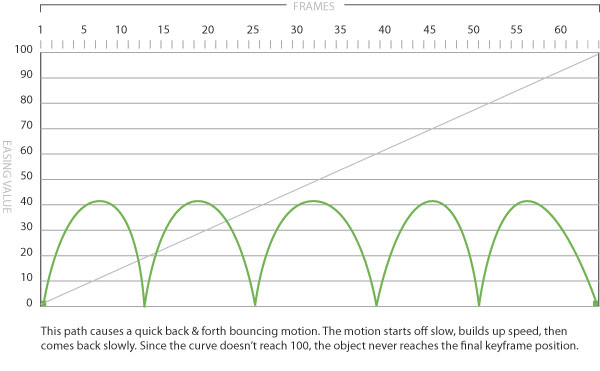
In this case though, the object never reaches its final destination because the curve only goes up to 40%.
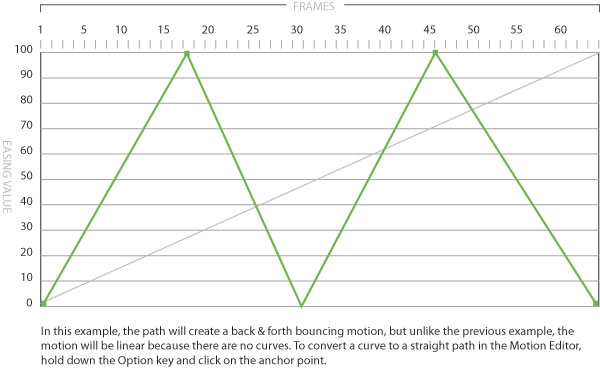
In the final example, we have an angular path. You can create this by Option-clicking on the anchor points to convert them from curved paths to straight paths. Although this too produces a bouncing motion, it's a linear path so there's no change in the speed during the animation. (fig. 6).
So, it may take a while to get used to, but there's a lot of good stuff in the Motion Editor.
posted by alemieux3 @ 9:52 AM
0 comments
![]()


0 Comments:
Post a Comment
<< Home